True Patriot Love
True Patriot Love


(Older Posts)
Table of Contents

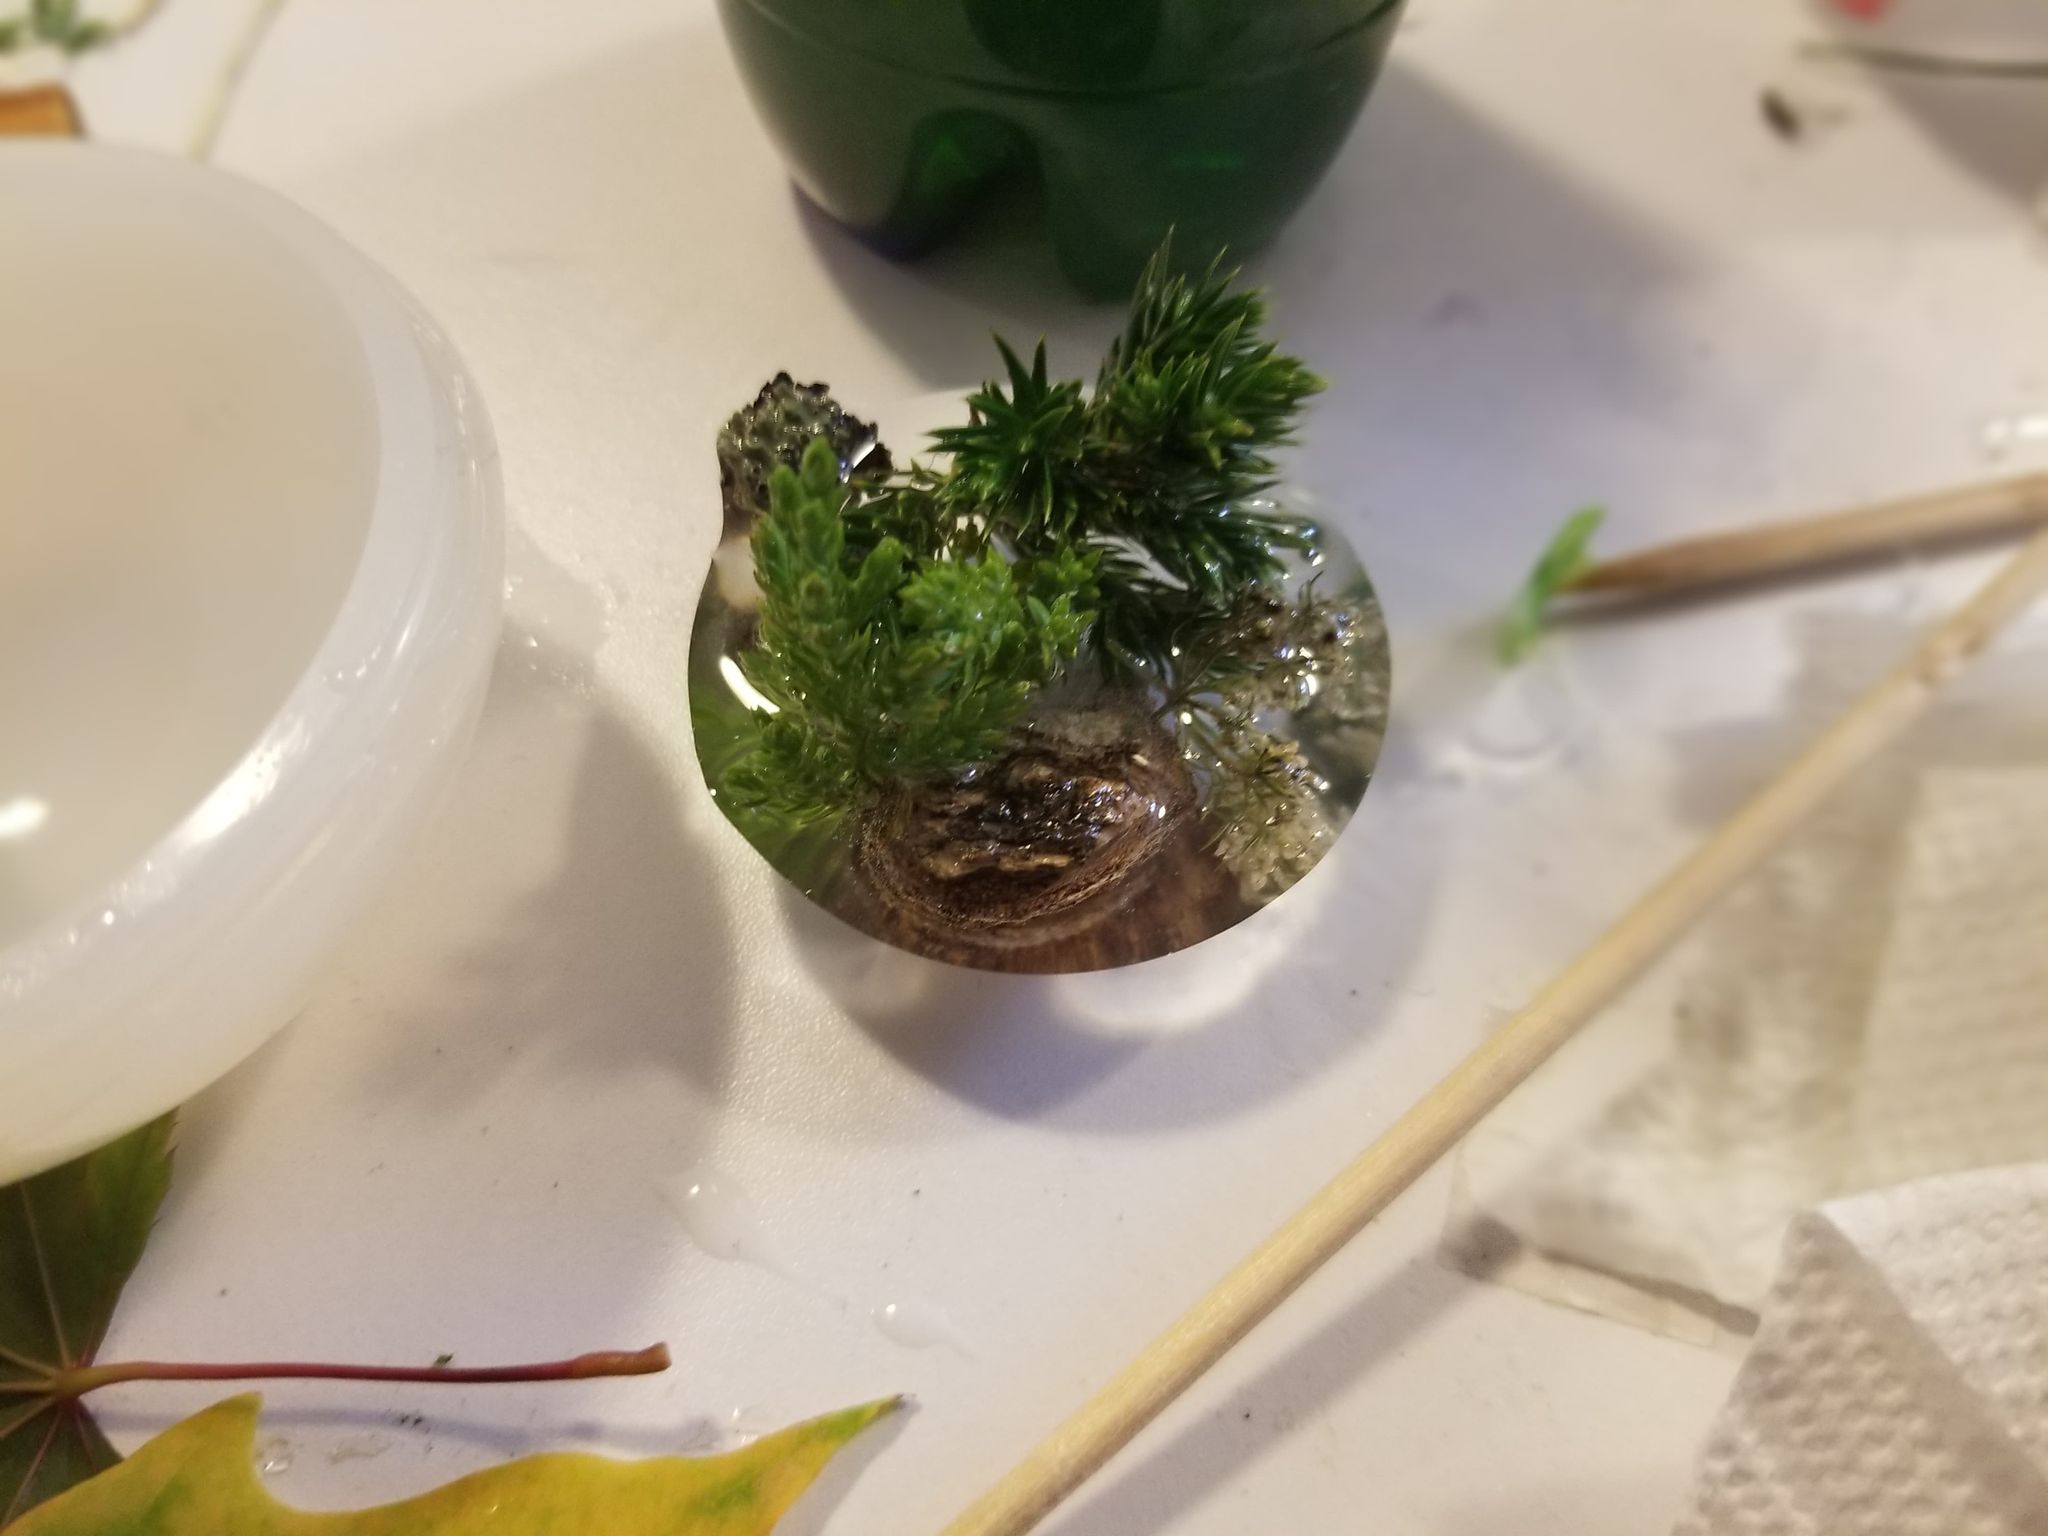
This blog is a record of the making of The Exercise. It is a resin forest and helmet stand I have made for the True Patriot Love Foundation. It will be available for their annual charity auction in November.
Kitchen Snapshot
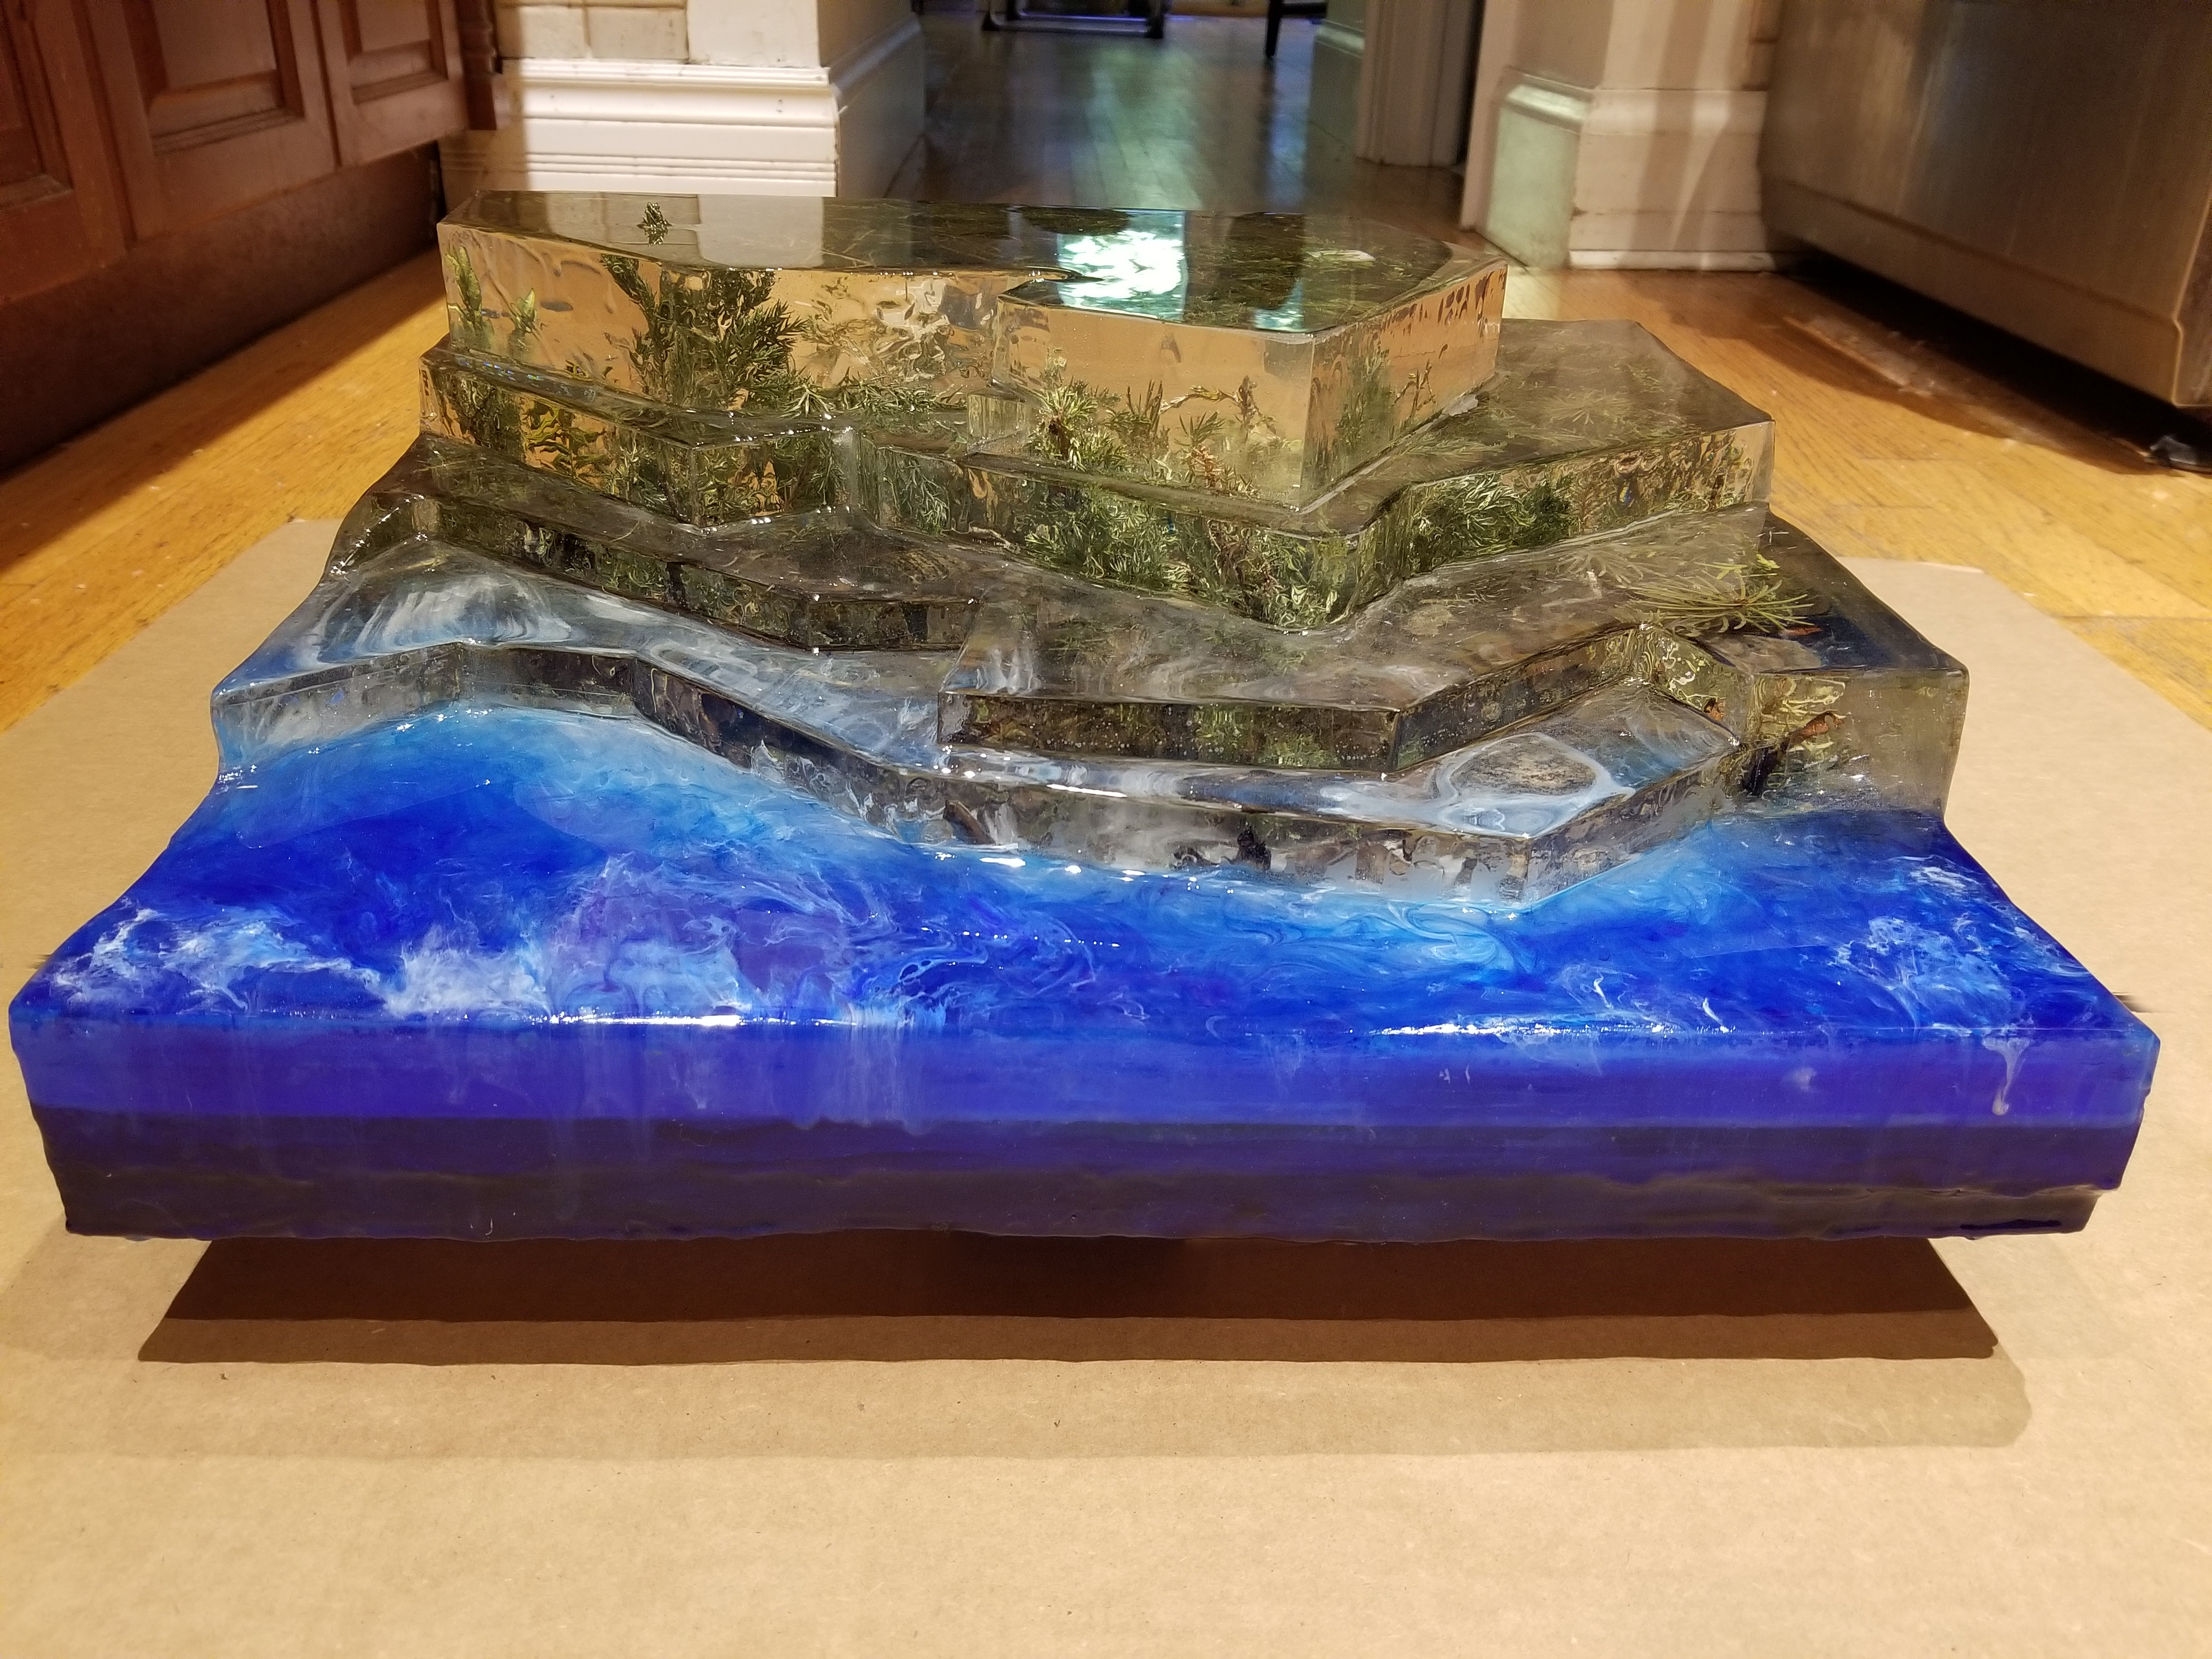
And… done. I’m exhausted. Yes, I KNOW it’s off center. Don’t worry… the base and the helmet stand are not glued together. All is right in the world.
Base Complete
I spent the evening wet-sanding down the base with finer and finer sandpaper. This creates white dust that gets into the cracks. I dug them out and polished the piece one final time with an electric toothbrush. Then a last coat of Topcoat Resin to protect the piece.
I painted the bottom of the piece dark blue and brown to match the water and the land. The brown looked flat so I ended up doing a little bit of scratching and painting to give it an organic look. My signature is on the back.
Cutting Columns
I have been having an issue with my column width for the entirety of this project. This, finally, is my solution. I cut the columns down the middle. With a coat of resin to create transparency, I will have one flat view and one curved view. These are solid resin. 3-5 of them will easily support the weight of the sky and the helmet. I will affix the helmet to the sky and the columns to the base and then test the security of the structure. It may be that I have to resin the whole piece together but I would rather not, as this will make the piece more delicate in transport. The sky is blue for now but the final layer will be closer to black. I used a deep pour, so I will have to wait 2 days to apply it. The bottom will need another coat of resin before I decide which side is up. And, of course, I will have to drill the stars.
The Final Pour
There were, as always, issues with the tier pour. First I had a leak on one side and had to break and remake the mold. Then I had to wait for the one-day resin to cure. Last night, I tested the mold with water. This made the mold secure but also introduced water to the interior. Resin and water do not mix. I discovered this when the water formed murky globs at the top of the piece. So I poured that liquid resin out and made a new batch. Finally, the 5th Tier is poured and curing. The sides require extensive sanding and another coat of resin, but this will be straightforward once the piece is out of the final mold. There are many issues with this piece, but I think the overall effect will be wonderful. I don’t know which I like better, the effect of refraction on the birds or the doubling of the rocket. I am so excited to see it cleaned up. Heck, I’m even excited to do the cleaning up! So much sanding. Ah well. It will be worth it in the end.
Painting and Carving
Rebuilt a small section of the mold that was causing issues and then spent some time carving and sanding. I painted a layer of night sky and liked the effect of clear resin over acrylic paint. I threw it on a tester piece. It might be really beautiful over the wood in the front but I haven’t decided yet. Do I want the contrast of the wood or a sense of depth with the blue?
Night Sky
Rebuilt the mold again. Going to be leveling out the sides and back over the next few days. I’m really looking forward to sanding it and coating one last time.
I have been uncharacteristically methodical and focused with the night sky. I have two drill sizes to use for the stars. This version has a moon flush with the piece on both sides. I poured a black and blue mix and I really like it. I’ll need an opaque layer. Maybe acrylic paint. And then I’ll do a deep pour with the black and blue.


Curing the Front
I spent a good long time removing the plastic and cleaning the silicone from the Tier 4. The resin leaked around the silicone. Honestly, it was easier to clean up than hot glue. The only thing that has really worked for me so far is the one day resin. Once I figured that out, I realized I had to think through a new schedule. I’m waiting one more day for Tier 4 to cure to be safe. Instead of wasting the day, I used the hammer and chisel to clean up the wood and resin at the front and bottom of the piece. I brushed on a layer of that TopCoat Resin.

Tomorrow, the piece goes back down flat and I’ll be able to level out the tiers again. I can also sand and topcoat two more sides. I have to decide whether I’m going to tint them. I think I might actually go with a very thin layer of blue to balance out the indoor lighting. I’ll see. If it adds some saturation to the forest, I’ll do it. If it obscures too much, I’ll wipe it off and go with a clear coat.
Columns
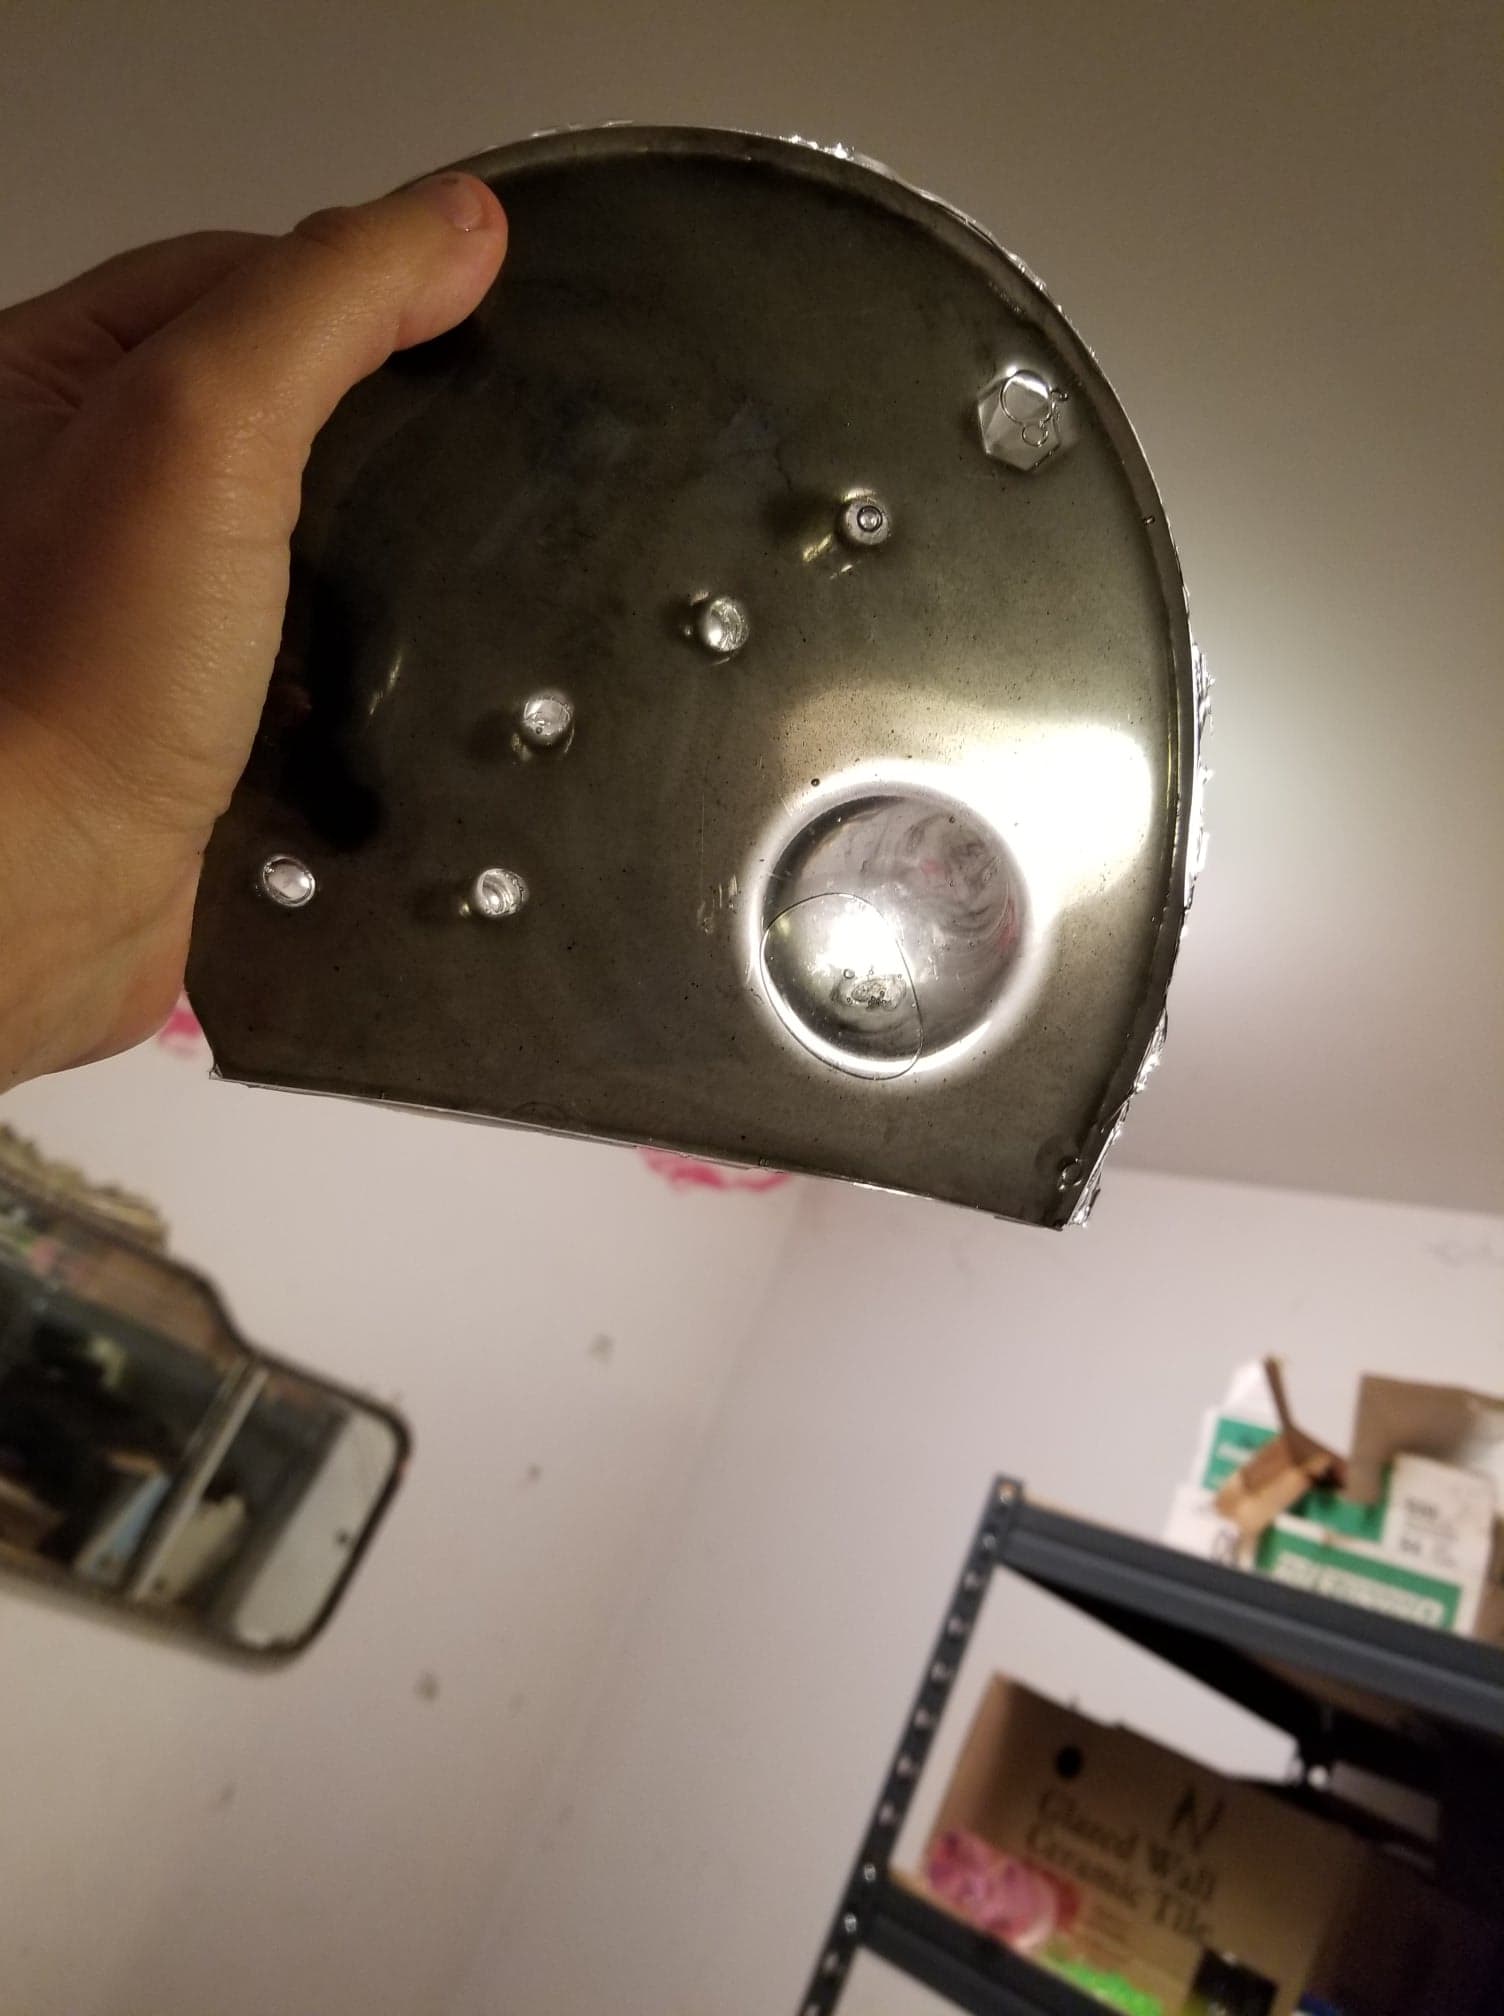
Maybe One More Coat - Worn, Gold Helmet
Tier 4 Pour (and the Return of the Section)
Poured the rest of Tier 4 today. Spotted my first soldier and the his buddy. Really looking forward to cracking the mold open on one side. Might see two or three more guys. I thought they were lost in the resin but it seems like the deep pour gets around some of the obscuration.
An Unexpected Journey (Covid)
My eldest has a cough. We drove to Markham to have him tested. Only a 20 minute wait once we got there because they screen and register over the phone. Now 3-5 days of isolation. We aren’t worried. It seems like a common cold. While we wait for the results, I’ll be making the stencil for the slogan. And planning. I ordered more resin just to be sure. MagicResin is a Canadian company. Their product cures well, with the fewest microbubbles of all the resins I’ve tried. I’m a fan.
The Surest Way to Lose a Day
… is to try to save a day. Silicone caulking was not the answer. Another first for me. Ah well. Flood coat on lower tiers looks mint. I tilted to save the resin. I know what I’m doing enough that it didn’t cost me anything but stress and time. I have to keep reminding myself that the fact that it takes work doesn’t undermine the success of the piece. I will be able to complete it and give it the polish it needs. It is just going to take… well, a lot more work.
Attachments and Ornaments
It was a risk, but I put a layer of black spray paint between the two black resin pours for the night sky. The first set last night so I applied the spray paint, waited an hour for it to be completely dry, and then added another thick layer of tinted resin. I am hoping this gives me depth to the darkness when the light shines through. It might give me an unfortunate stripe but I think I might be overthinking the details. It could be attractive. If it isn’t, I can easily cover it with spray paint or resin. I don’t want a wishy washy sky. I want a navigator’s sky. Speaking of which, I had better figure out my North star map for the drilling. Tomorrow, I’ll test drill sizes on the other skies.
The helmet itself is much more to my satisfaction. I kept a little of that golden green that I feel in love with but I spent a few hours sanding down layers until the piece had some wear. I cleaned off the dust with alcohol and then added a final coat of clear resin. I tried out a maple leaf as an ornament and, unfortunately, I think it brings both elements down. I am now rethinking the leaves as part of the support structure for the sky and helmet.
I wanted to add little Eagles to tip my hat (helmet?) to the air element but I think I can add them to the sky above the forest. There isn’t much hope of anyone spotting my section in the woods, so this will be a nicer easter egg than the rocket.
There will be a large gap between sky panel and the front opening of the helmet. I have fit the back of the helmet to the sky which tilts the helmet up respectfully. While I wait for the resin to dry, I will create the stencil that will potentially fit inside. I know what I want to write, considering the ornament I will most likely go with and the theme of the piece. We’ll see if I can still manage to make a decent stencil. It’s been a while.
Three Tiers
So many possibilities but I need to follow through with the plan.
Sidenote: Turned my Maple Leaf plan into a digital zine. Took about 20 minutes. “MAPLE” has many times more hits than this blog. The internet is amusing.
Mold Cracking
It went better than I feared but not as smoothly as I’d hoped.
8 hours to take off the mold, build a new mold, and pour a thin resin overnight to seal the new mold in place. My notion is that sealing it completely with controlled leaks will save me lots of time later on. Back tomorrow to pour the casting resin. Meanwhile, I added more gold to the helmet. I love the colour but I don’t love the drips. I think they are unavoidable at this point but I will sand down this coat and reapply just to be sure. I found a method to attach the cornflake to the helmet. So far, I like it.
I think the Maple leaves may well end up being too delicate to go ahead with. The trouble is the drying process. They are so fragile. I will try coating my best ones tomorrow. It may be that I improvise something that works with the silicone mats as a base, leaving them flat to dry instead of hanging them.
Refraction Achieved!
I have drawn refraction before – most often when a portrait model is wearing glasses. But this is the first time I have ever made something that produces refraction. I spent entirely too long staring at my double rock before walking away from the project for the night.
Lots of problems left to solve. Getting the helmet a consistent, wet gold is tricky. I have to keep chipping off the drips at the bottom of the helmet. I took off an actual piece of resin, which will need some creative repairs. Meanwhile, I’m not sure how I feel about my logo ornament. It is fairly large and it does not match the organic feel of the piece. But, then, I also think it might pull the piece together. It’s good that it is finished. I have the option (but not the obligation) of using it.
Maple Leaf - The Plan in 8 Steps
New Day, New Leak
The second tier is going to be a two part pour. The first pour should seal the cracks. The second pour will give it most of its height. As soon as I saw the leaks, I tilted the piece, so I shouldn’t lose much resin here. I will un-tilt the next pour to level the surface. In theory, that will make the mold easier to seal up.
Not Again!
That triple sealed wrapping job I was bragging about? It leaked. And then it pooled. And then that resin set at the bottom of the piece. Fortunately, the previous leak had created a smooth surface on most of the bottom. That meant that the new leak only stuck in one strip. 2 hours to remove it without damaging the piece, first by hand and then with a hammer and chisel. Another two hours to re-mold. This time, I taped the plastic right on to the piece. Instead of backing it with a solid wall, I cut the plastic on a diagonal so it won’t flop and taped it. It still has gap issues but this time the piece is elevated so if it leaks, it won’t stick to the bottom. I gave it some structure with plastic clothes hangers.
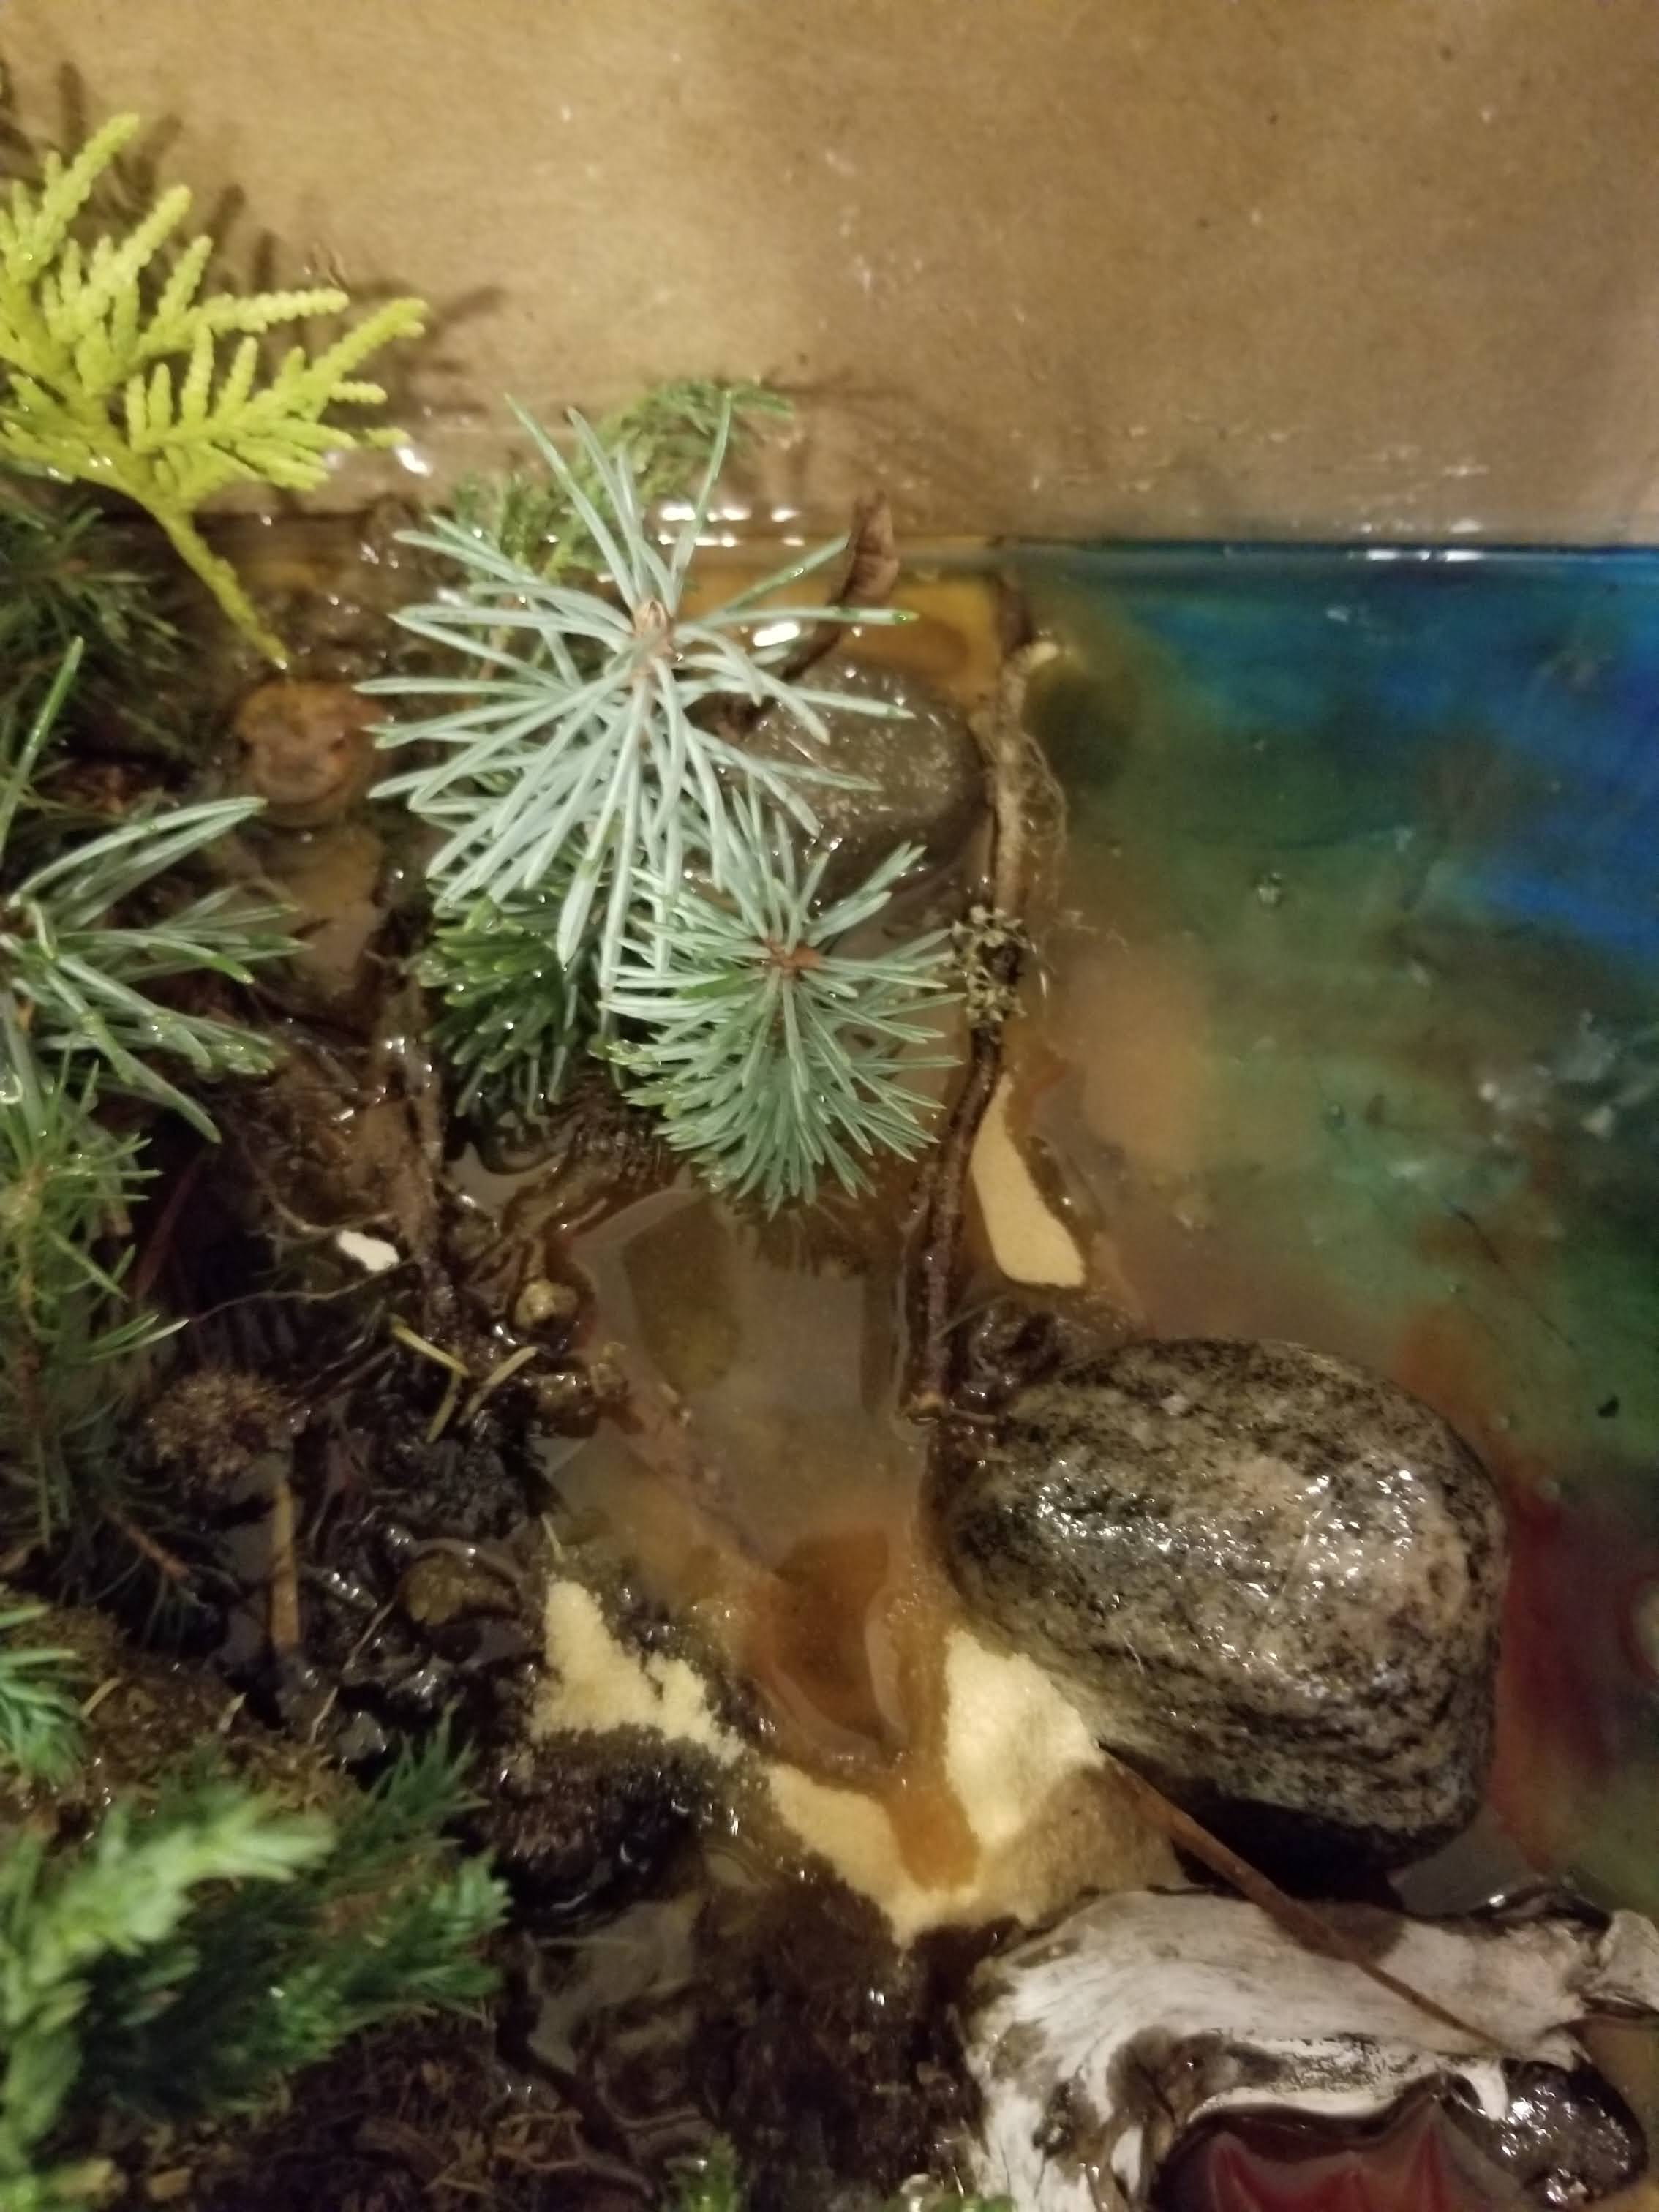
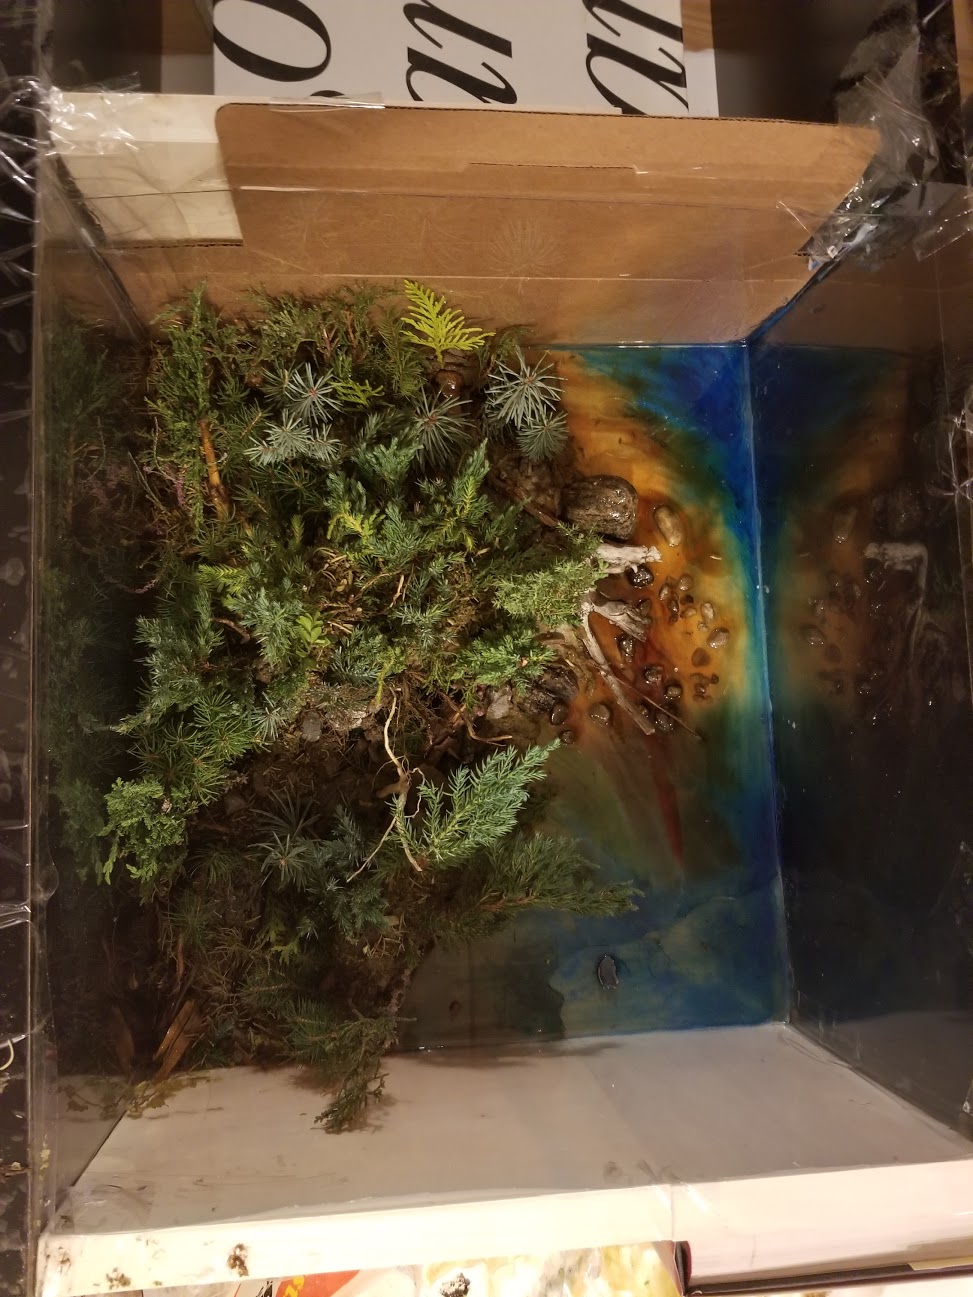
I resealed it the new mold by dripping resin into the cracks and corners. Once I felt secure that it won’t leak, I flooded the water to smooth out some issues. I added some more details to the ‘water’ to give it more depth and because I really couldn’t resist.
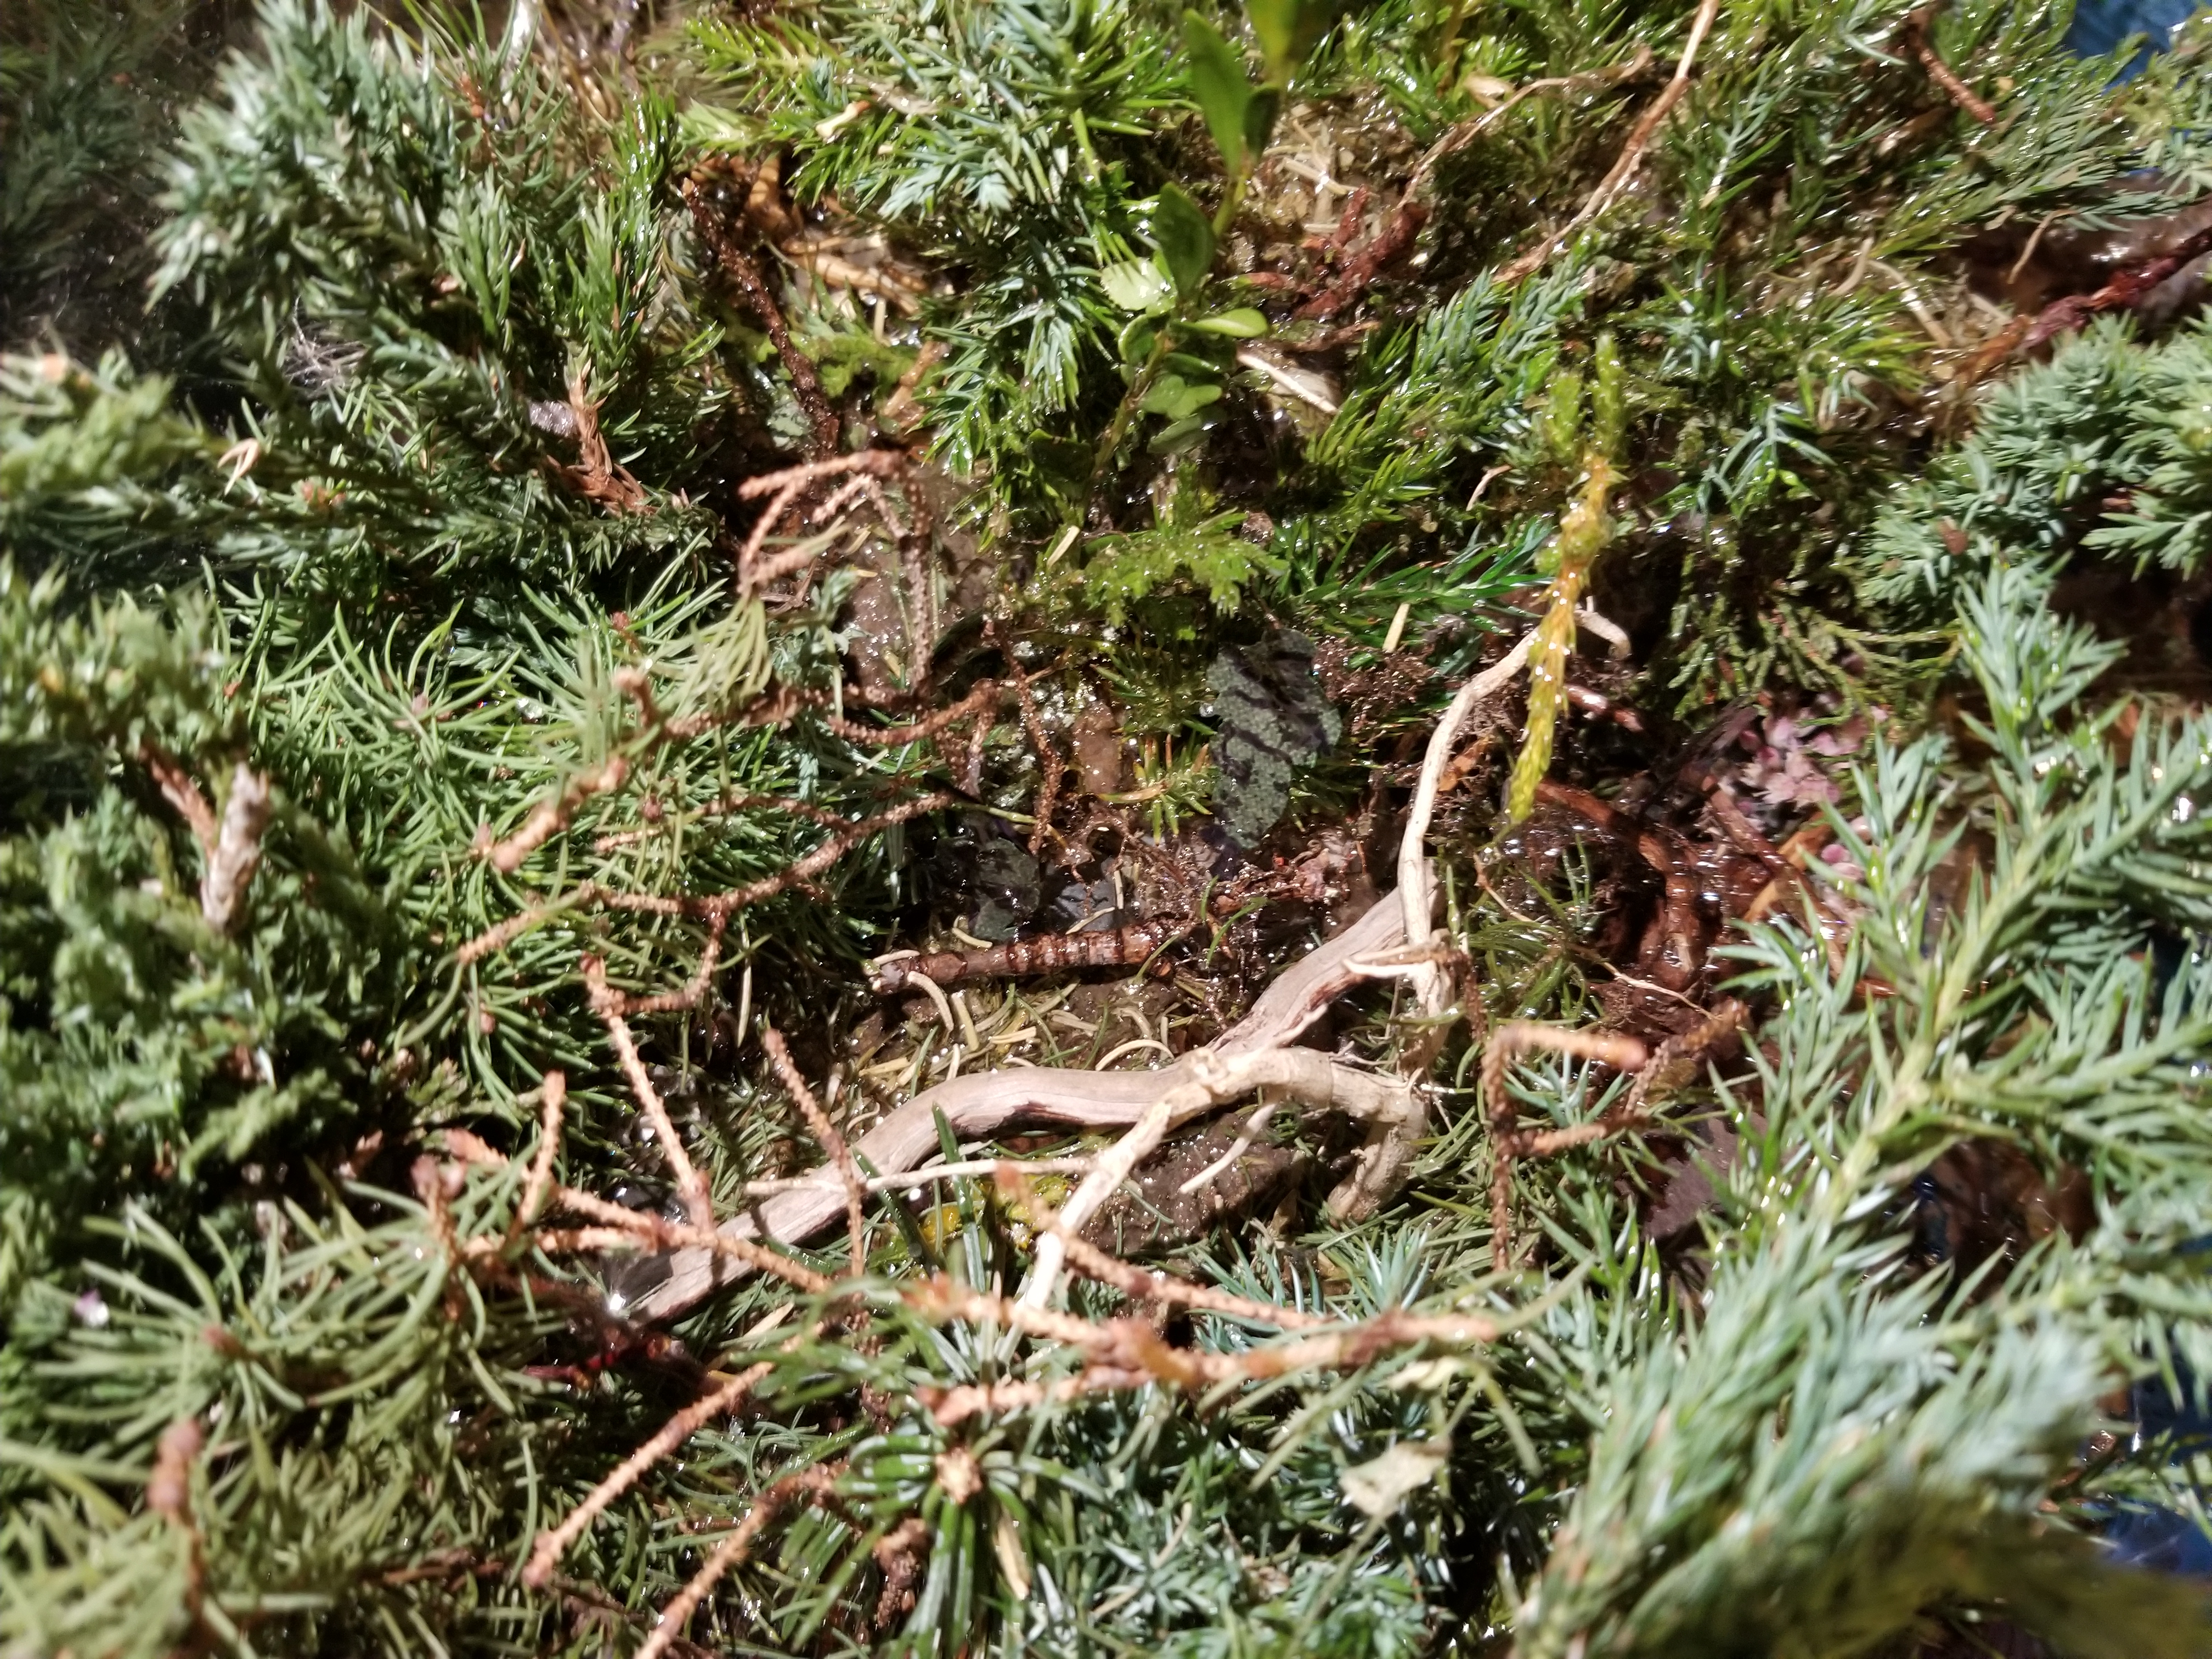
It was great to see the piece outside. Resin colours and dry flowers will fade if left in the sunlight for too long but they do look great in real light. I think these pictures look surreal.
The Fix
Two days fixing an error that could have been avoided with a little more patience.
Yesterday, lifting the piece and resealing it while it leaked was a frantic mess. Intellectually, I knew Casting Resin would be watery, but I failed to internalize and act on that knowledge. Like an idiot. I started off today with the hope that the leaked resin might have sealed up the cracks. It did not. I smartened up and triple sealed it before pouring. First I duct taped the sides of the mold to the bottom of the piece. Then I re-taped those sides. Then I grabbed a large plastic sheet and taped that to the bottom and sides of the mold to catch any leaks that get through the tape. And then I realized that I could have avoided all the time and headache of yesterday’s disaster with 15 cents worth of plastic bags. Lesson learned, right?
Wrong. The next thing I did was make another huge mistake. I tried to hot glue down a curved plastic mold. Onto uncured resin. Because I have the patience of a squirrel. That failed and made a mess. The good news is my new seal worked. I pulled off the hot glue and curved plastic, and tilted the whole piece up so the resin would run to the back. This is giving the water area a nice clear coat on an angle. I like the slope. It also gives me a good inch of resin in the back of the piece, which means that I haven’t lost the entire day’s layer. Casting Resin cures in two-inch-thick layers. Each layer takes days to cure. I am taking that curing time to properly work out the logistics of my next steps. This time, I measure twice and cut once.
I think my big issue here was switching between a creative mode and a practical mode. When I was building the forest and the water, I needed to be in a creative headspace. I spent a lot of time arranging the individual pieces so that it matches the vision and feel that I have for the piece. But I stayed in that mode when it came to executing my plan. I wasn’t a total fool. I only lost four or five cups of resin. The final piece won’t show any damage.
Facing these challenges (of my own making), I realize that I want the next tier to follow the landscape. I want it to have a topographical feel. But I can’t use a curved wall. It will distort the vies of the forest from that side. What I really want is facets. That means I am going to have to build a multifaceted, perfectly sealed plastic wall. To do that, I am going to have to return to the faster curing, lower viscosity TopCoat resin to make sure I have an actual seal. I will have to leave the seal to cure overnight before going in with 2″ of low viscosity Casting Resin. It is going to be a challenge making sure the wall is on a 90 degree vertical from the “ground”, which is now sloped from today’s tilted pour. I’ll need very thin wedges (paper wrapped in tape?) and a level.
I’ve included two “sketches” I drew on my cellphone. I’ve never used a photograph in a plan before and, despite how awful these sketches look from an artistic standpoint, I really love them. (If you’re interested, you can click on them for a little more information.)
Meanwhile, I am seriously considering the fact that, in order to have a resin sky that fits into the helmet, I am going to need to pour directly into the helmet. I had another sky not work out. It looks like the half sphere will not work for the moon. I can’t pour the black deep enough to create a real night sky effect. So my moon is going to be the circle bottom of a hollow cylinder. I have made a version of the moon that I like but I will probably make another with darker walls. I realize that I have to drill larger holes for the stars or they won’t let light through. And then There needs to be a gap in the side of the sky that will allow an adult hand to reach in to change the light. That means I am going to have to put in a curtain in the sky. This is what comes of building “an ever-fixed mark”. As soon as I am finished with the sky, I will have to do the write up for the piece. It’s going to be hard to say goodbye to this one. It’s so personal.
Disaster
I removed two sides of the base, breaking the resin seal with the plastic on three sides. I thought I resealed well but I was wrong. The leak was massive.
Next steps, remake the mold and then seal properly. I am glad I gave myself so much time to complete this project. It is much more technically challenging than I am accustomed to but, well, that’s army for you. The 70% solution works most of the time but when it doesn’t, clean up is a… lot.
The Helmet Finally Makes an Appearance
For the helmet, I started with a base coat of white on the helmet, another coat of gold and green, and then a thin brushed-on coat of resin. I will sand it a little so the next coat sticks.
I am so tempted to amp up the gold and green but I think green and black might also really work, and I don’t think this project really calls for sparkle.
We’ll see what happens once the leaves are flat and dry. If they maintain some of their vibrancy, they’ll look good on the base as it is. If they get too dull, they’ll need more darkness and depth in the background for contrast.
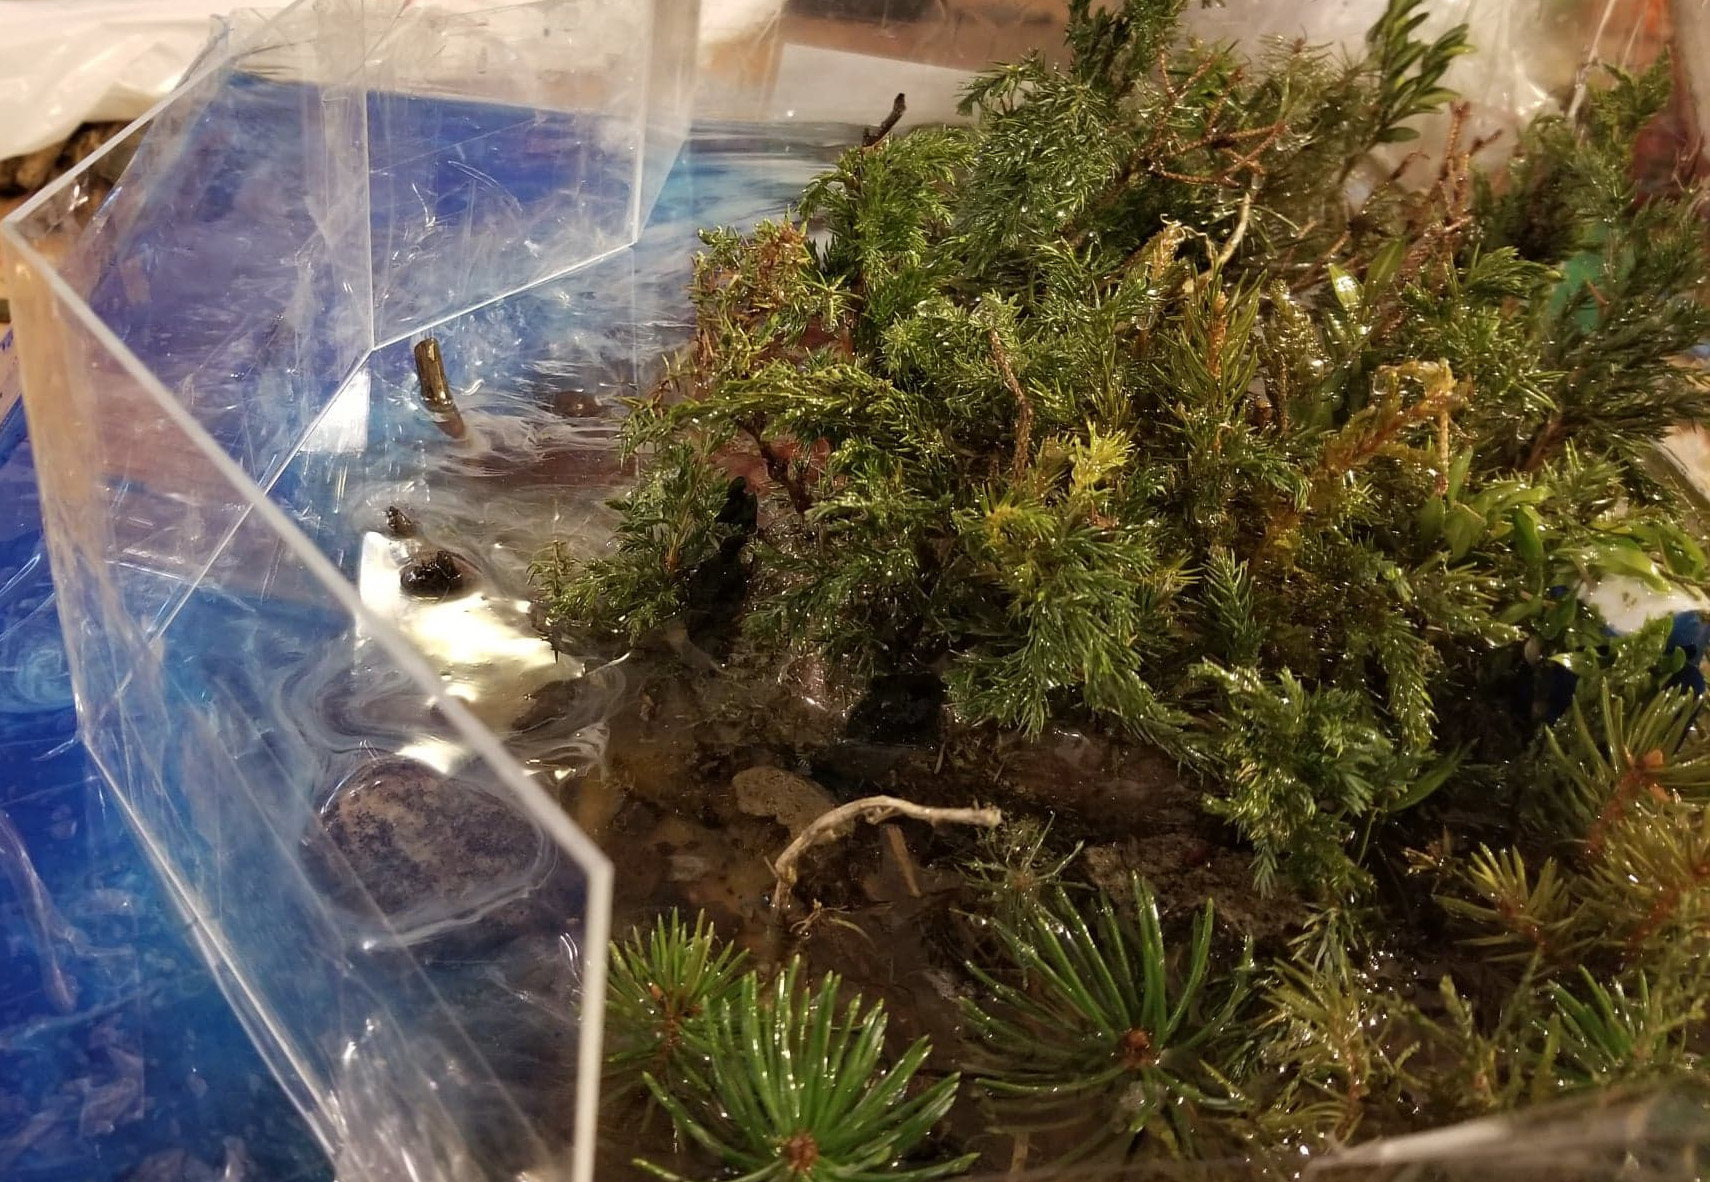
Spot the Soldiers - Round 1
Click on the images for a better (but still blurry) view. These will look quite different from the side than they do from the obscure angles in these photographs. It is quite difficult getting the cutouts in focus inside the box. But perhaps they will be even more obscure when the piece is finished. Right now, the forest has a section of Infantry soldiers moving out of their RV. The next step will be to add their mission. 😉
Sketches
I’ve made so many sketches with columns but in the end, I think it is one column I need, not many.
More Layers of Resin
Now things become more complicated. I have water. I have a forest. I even have the makings of the moon. Now I need air. There is no way to avoid bubbles after I pour over the trees. They’re very, very dry. No fire. So it is fire on the resin before the pour and then a slow pour and some bubble hunting with a toothpick.
A Section of Infantry Soldiers
I made these tiny infantry soldiers using public and private photographs, Photoshop, and a digital version of the CADPAT pattern.
The soldiers I printed out for the base are so small that most of their details were lost. I had to go over the black because the printer ink was not dark enough. Then a quick coat of green on the other side, mod podge for protection, and resin to glue them in place with approximately scaled 5 metre spacing outside their RV. At least one soldier is visible from every side right now. I hope the resin won’t obscure them too much.
(I have included the larger set here. If you would like to use it, just click on the image and save. The background is transparent.)
A Layer of Waves
Time Crunch.
Overdid the white foam of the waves and had to scrape away like mad. I will add another layer of blue and try again. It’s going to look really layered from the side. I am very interested in how it will turn out.
I am still working out how to make the stars smaller on the night sky. Included a picture of the trial here.
Flooded the trees with clear resin. I had difficulty burning out bubbles. Don’t want to start a forest fire.
Field columns are coming along nicely. They’re my favourite so far.
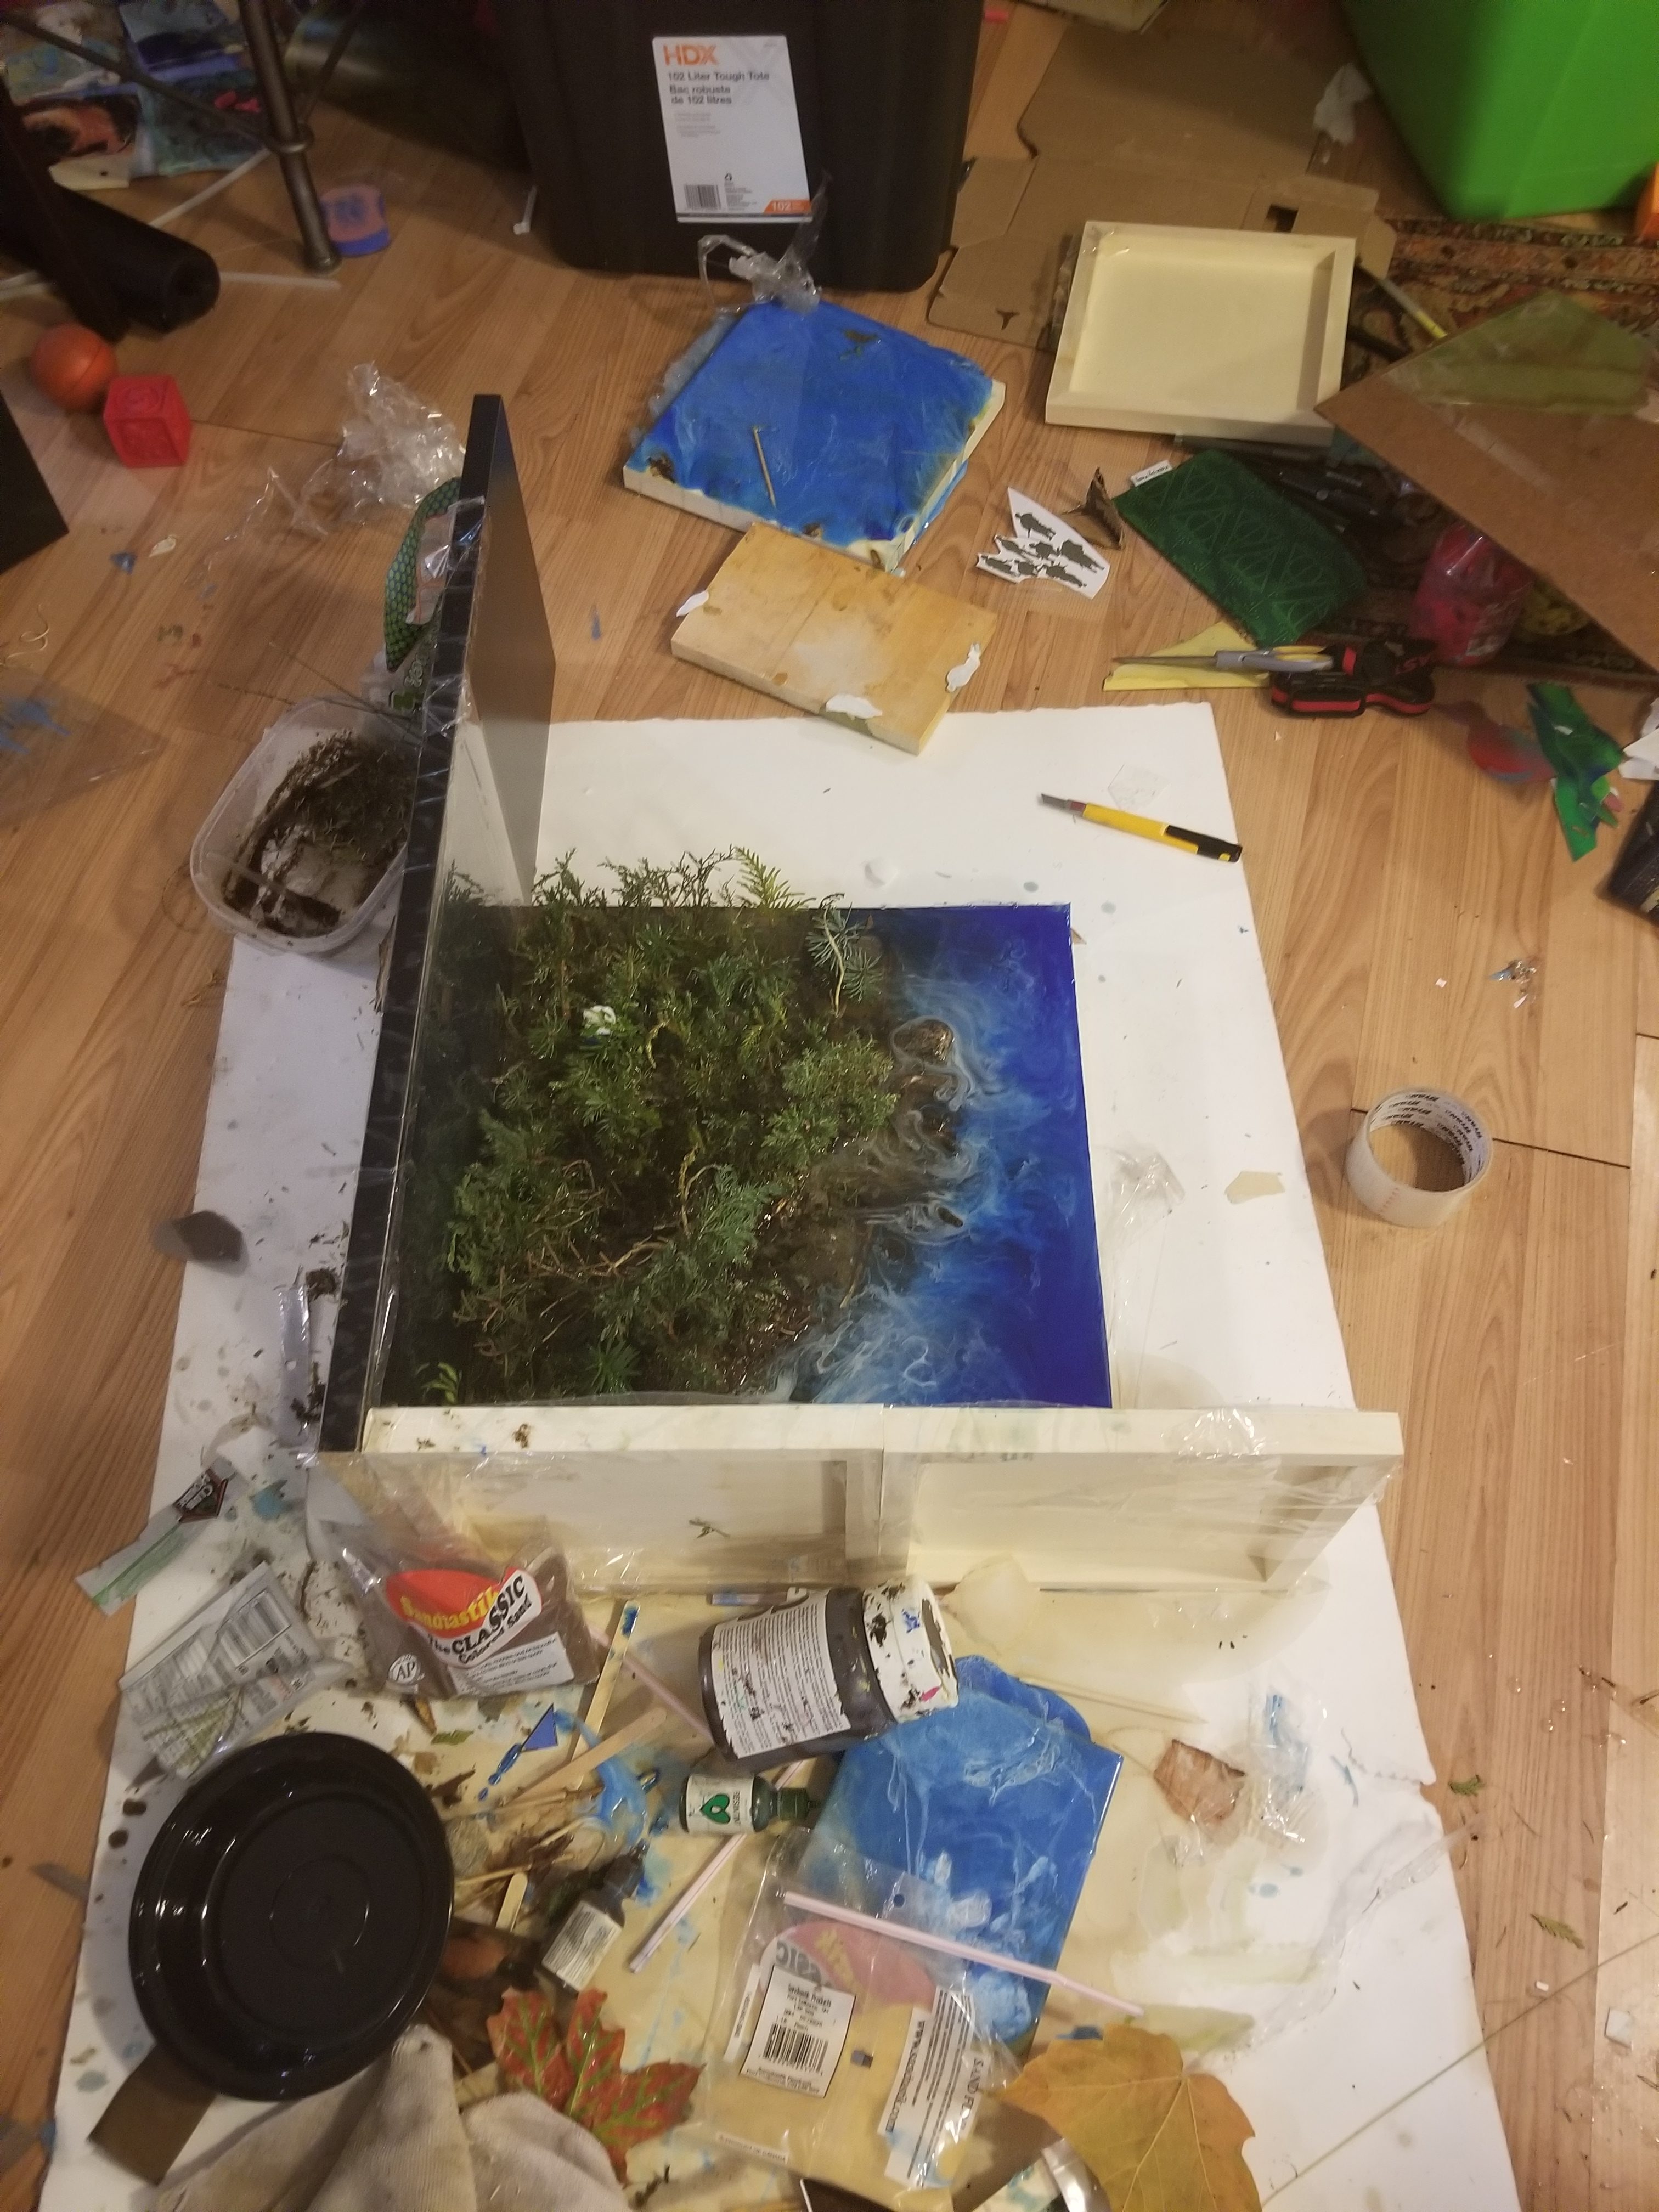
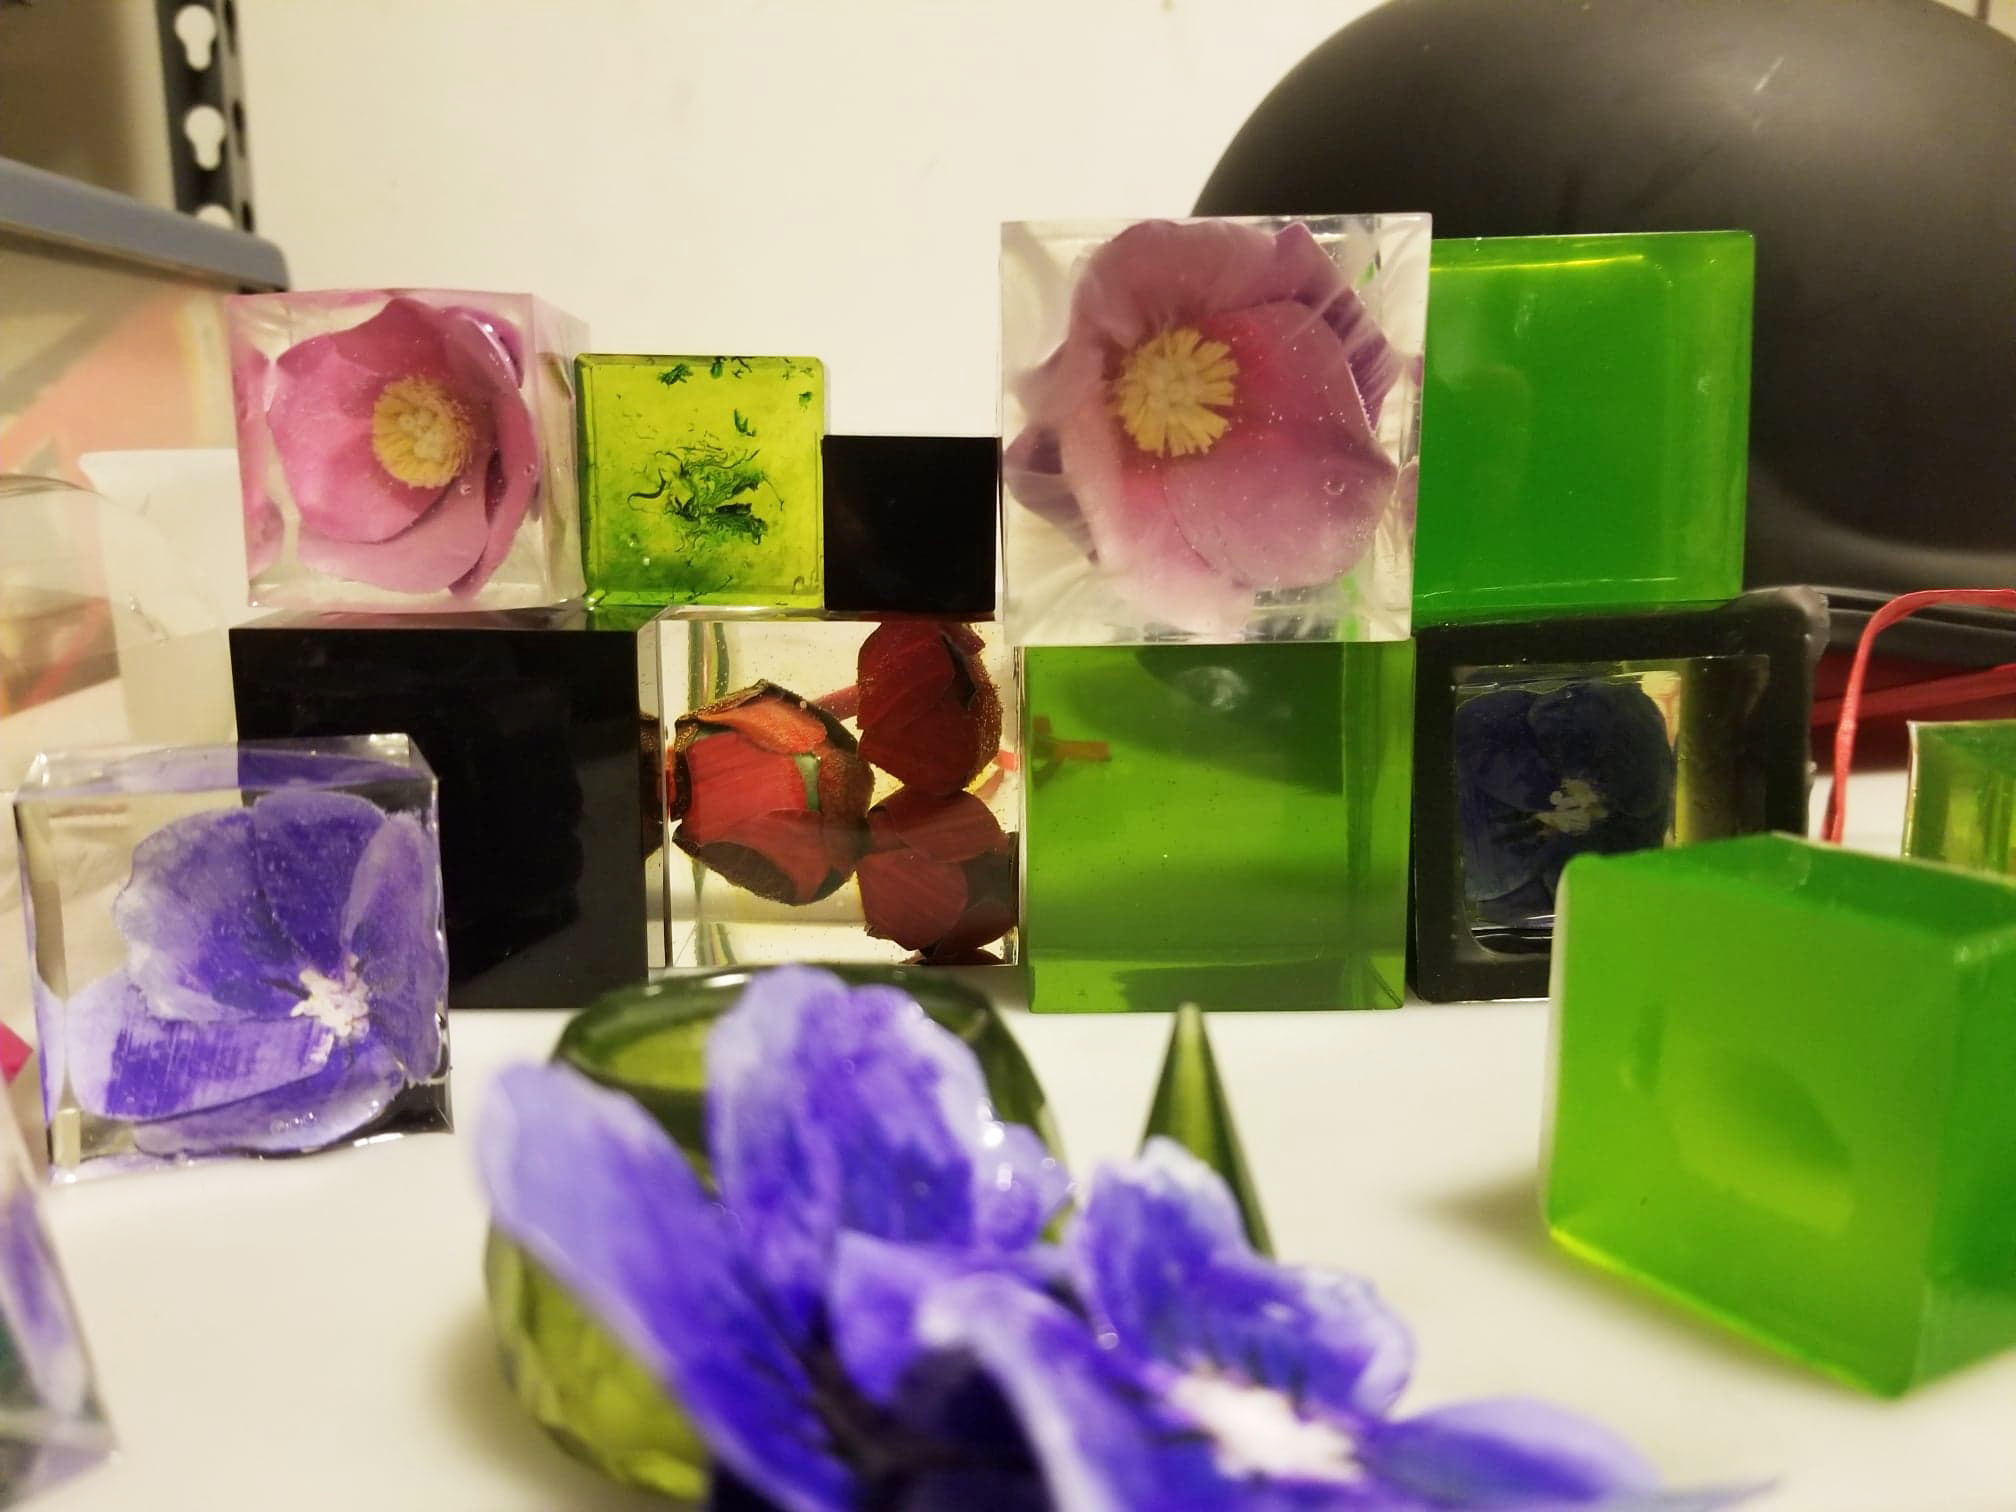
Progress on the Base
Added two more layers of resin today. The water has more depth. The next tests will be creating a shore with waves and giving the mold facets so it isn’t just a cube.
More Natural
It was a hard to scrap the existing base, especially because that part of the project was very nearly complete. But this feels more authentic to me.
Drying the greenery is interesting. The conifers hold up well but everything else becomes almost impossibly delicate in a 3D space. I did manage to get in a little creeping vine and a few spots of flowers tucked away in the corners. Those moments exist in Canadian forests and it is important that they be there. I went to the grocery shop and stumbled on a huge bag of dried spices. So now the whole project smells sweet because those pre-dried leaves are littering my forest floor.
We shall see how the resin pours go. It’s going to be… interesting. I know I want something more dynamic than a cube. Right now I have a design in mind that would give me one facet to focus the viewer’s attention. It’s going to be very tricky to install and pour.
I’m happy to say that my trial for the moon and stars went well. My theory is holding out and I even achieved a real glow around the moom. Too bad the trial itself isn’t usable in the final piece and I’m waiting for more resin. I think I’ve learned my lesson. Glue with clear and set before adding the black dyed resin.
Landscape in Pieces
The parts are coming together. I am encouraged by the forest trials. Now that the mountain shape has been established, I can start planting trees.
CADPAT Trials
(Wiki) Canadian Disruptive Pattern is the computer-generated digital camouflage pattern first issued in 2002, and currently used by the Canadian Armed Forces (CF). CADPAT TW is designed to reduce the likelihood of detection by night vision devices.
(Click on the large images to read a description.)
3D CADPAT
(Wiki) Canadian Disruptive Pattern is the computer-generated digital camouflage pattern first issued in 2002, and currently used by the Canadian Armed Forces (CF). CADPAT TW is designed to reduce the likelihood of detection by night vision devices.
If this design works as I hope it will, the CADPAT will include the flowers without being visually overwhelmed by them. It should still read as CADPAT to the casual observer.


Assembling Quebec's Blue Flag Iris
Materials: paper, acrylic paint, ink, mod podge
Popping Bubbles with Fire - Resin Process
Mixing and pouring resin produces bubbles, which remain in the finished piece. The process of popping them with fire must happen many times before the resin hardens.
Nova Scotia - Mayflower Anthers
The stamen of a flower consists of a filiment (tiny stalks) and anthers (the little pod that produces the plant’s pollen). I
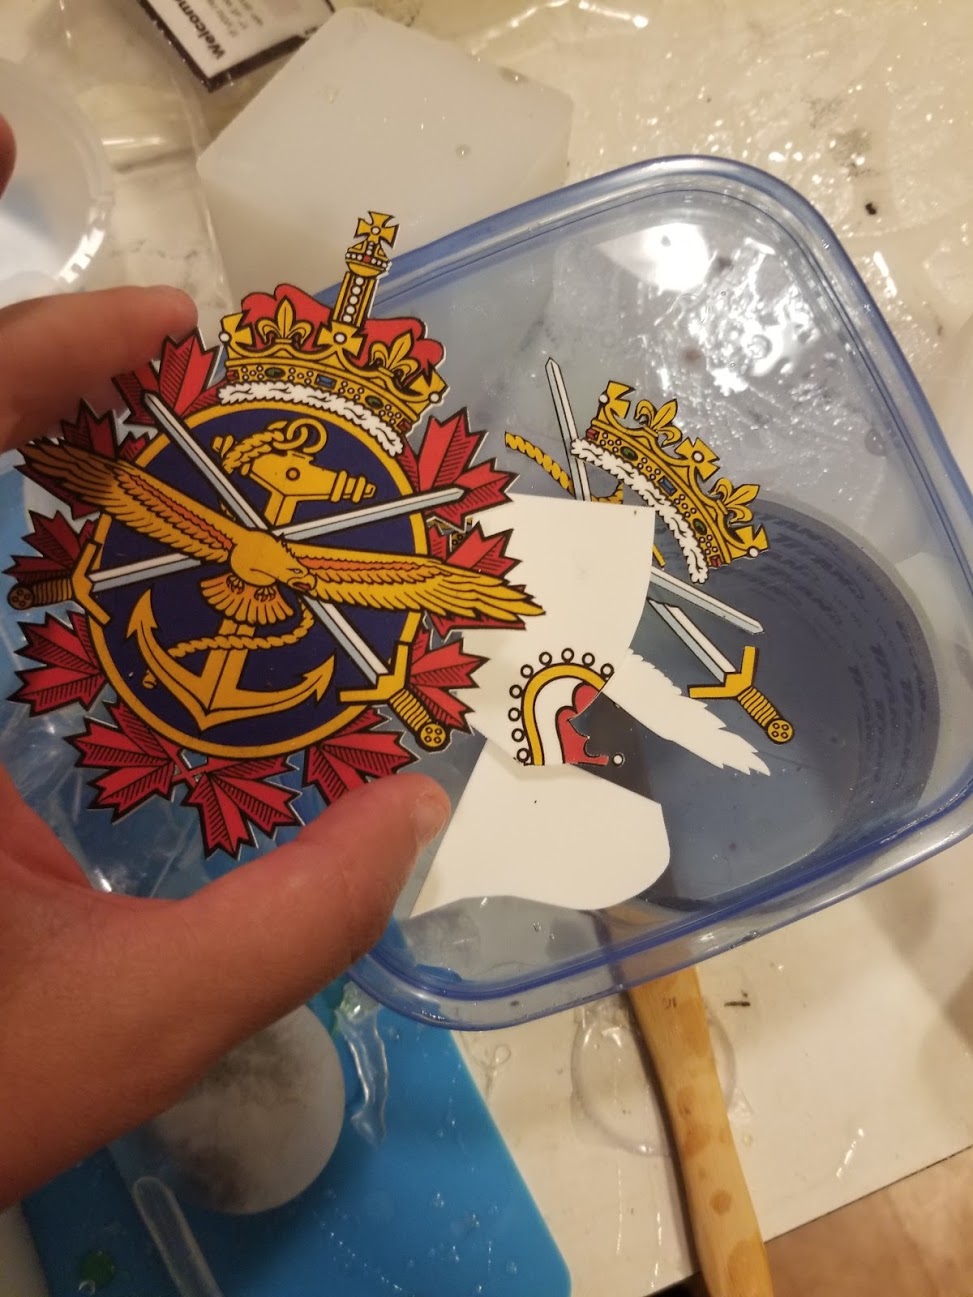
Dipping Gallery


I made the filiments by folding printer paper over a layer of mod podge in 2 layers. I then cut, painted, and rolled the paper. Once the filiments are dry, they can be dipped in another colour of paint, left to dry, and redipped.
I use painters tape to help secure the filaments together. This can be cut and painted. The pedals will be curled up on these Nova Scotia Mayflowers, so the details around the base will not show.
The base of the filaments can be cut and painted. The pedals will be curled up on these Nova Scotia Mayflowers, so the details around the base will not show.